
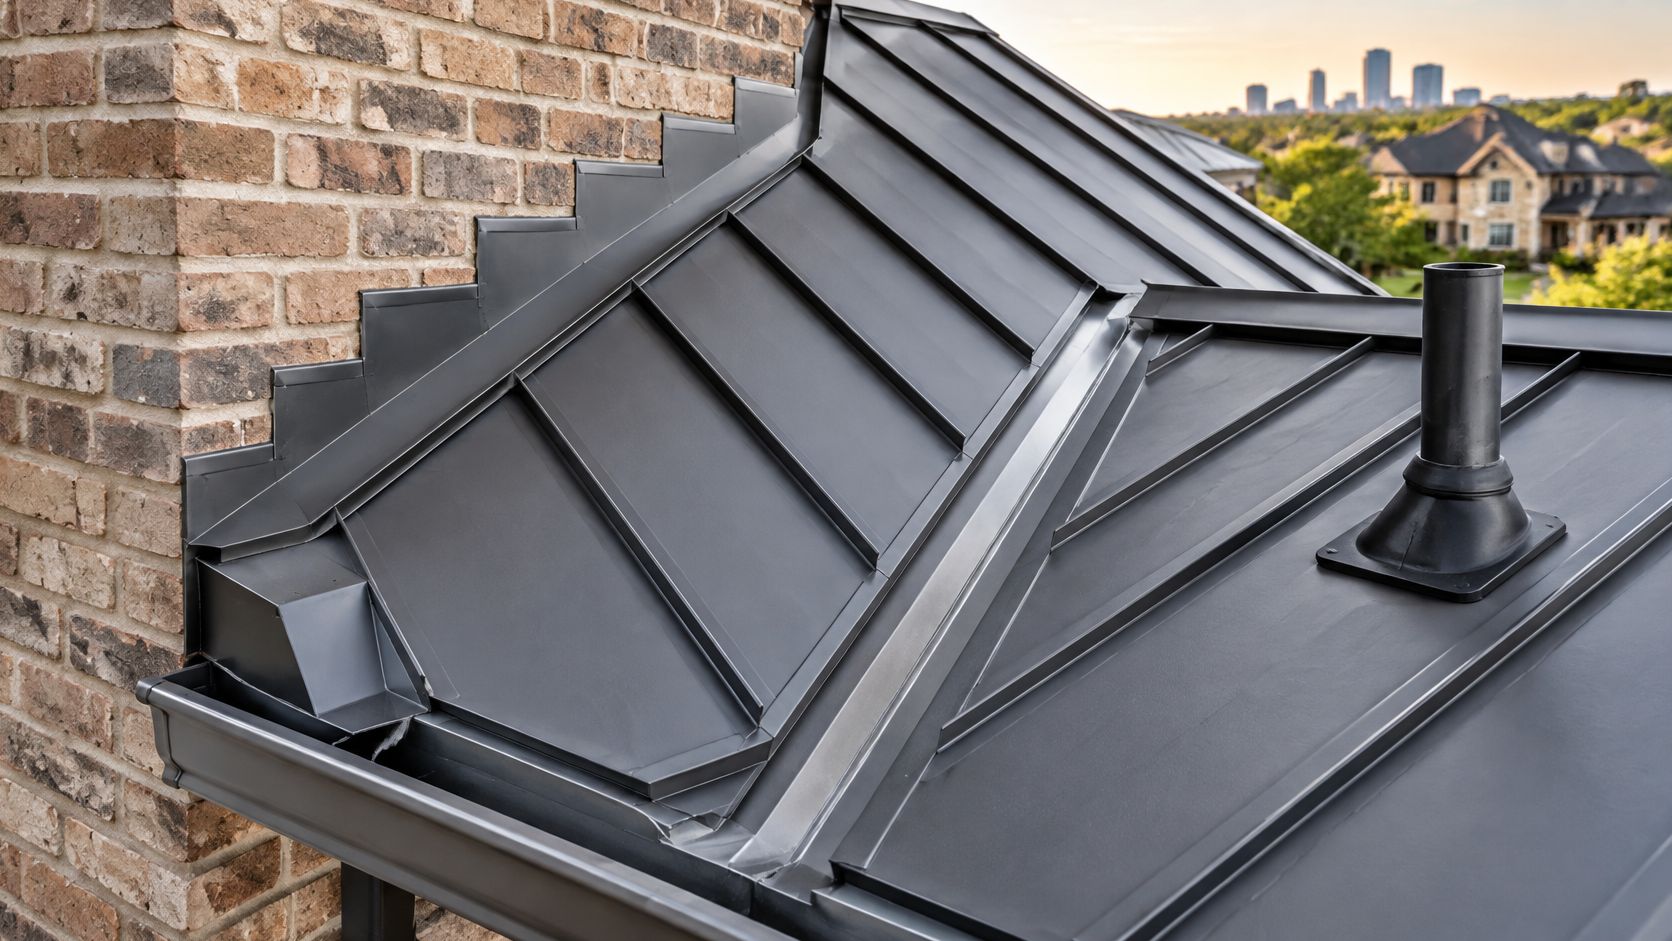
Metal Roof Flashing Types in Fort Worth
Steel flashing rose from $3.20 to $3.80 per linear foot between 2024 and 2025, an 18.8% increase, according to RoofPredict's material-cost report. That makes ordering the wrong flashing twice an avoidable expense. A heavier piece in the wrong location still won't stop the leak.
For homeowners in Fort Worth and surrounding cities, metal roof flashing types are best understood as a water-control system, not a rack of interchangeable trim. The right decision starts with the junction, follows the water downhill, and accounts for how the wall and roof move independently. A shingled sidewall, standing-seam headwall, and copper chimney pan need different details even when they're on the same house.
Table of Contents
- Metal Roof Flashing Types at a Glance
- How the Flashing Categories Fit Together
- Step Counter Apron and Continuous Details
- Valley Trim and Kickout Flashing
- Gauge Thickness and Metal Pairing
- Which Piece Each Junction Needs
- Fort Worth and Nearby City Checks
- Repair or Reflash the Junction
Metal Roof Flashing Types at a Glance
Metal roof flashing types, locations, and minimums
| Type | Typical location | Minimum cited | Best with |
|---|---|---|---|
| Base | Roof-to-wall or curb transition | 0.019 inch corrosion-resistant metal | Walls, curbs, deck angles |
| Counter | Over the top edge of base or step | Sheet-metal cap covering the upper edge | Masonry, siding, chimneys |
| Step | Sidewall, one piece per course | 2 inch lap, about 4 inches up the wall, 2 inches onto the roof | Shingles and panel courses with an approved course-by-course detail |
| Apron | Headwall or chimney front | At least 4 inches on wall and roof when detailed as continuous | Headwalls and dormer fronts |
| Continuous | Long wall junction on some tile or profiled roofs | 4 inches up the wall and onto the roof, 6 inch flow laps | Profiled tile and selected metal runs |
| Kickout | Eave end of a sidewall run | Diverts discharge into the gutter | Sidewalls ending at an eave |
| Valley trim | Where two roof planes meet | 15 inches wide, or 8 inches each side plus a 3/4 inch rib under the applicable provision | Open metal valleys |
| Penetration | Vents, pipes, chimneys, and other openings | Purpose-made base or collar | Boots, pans, and curbs |
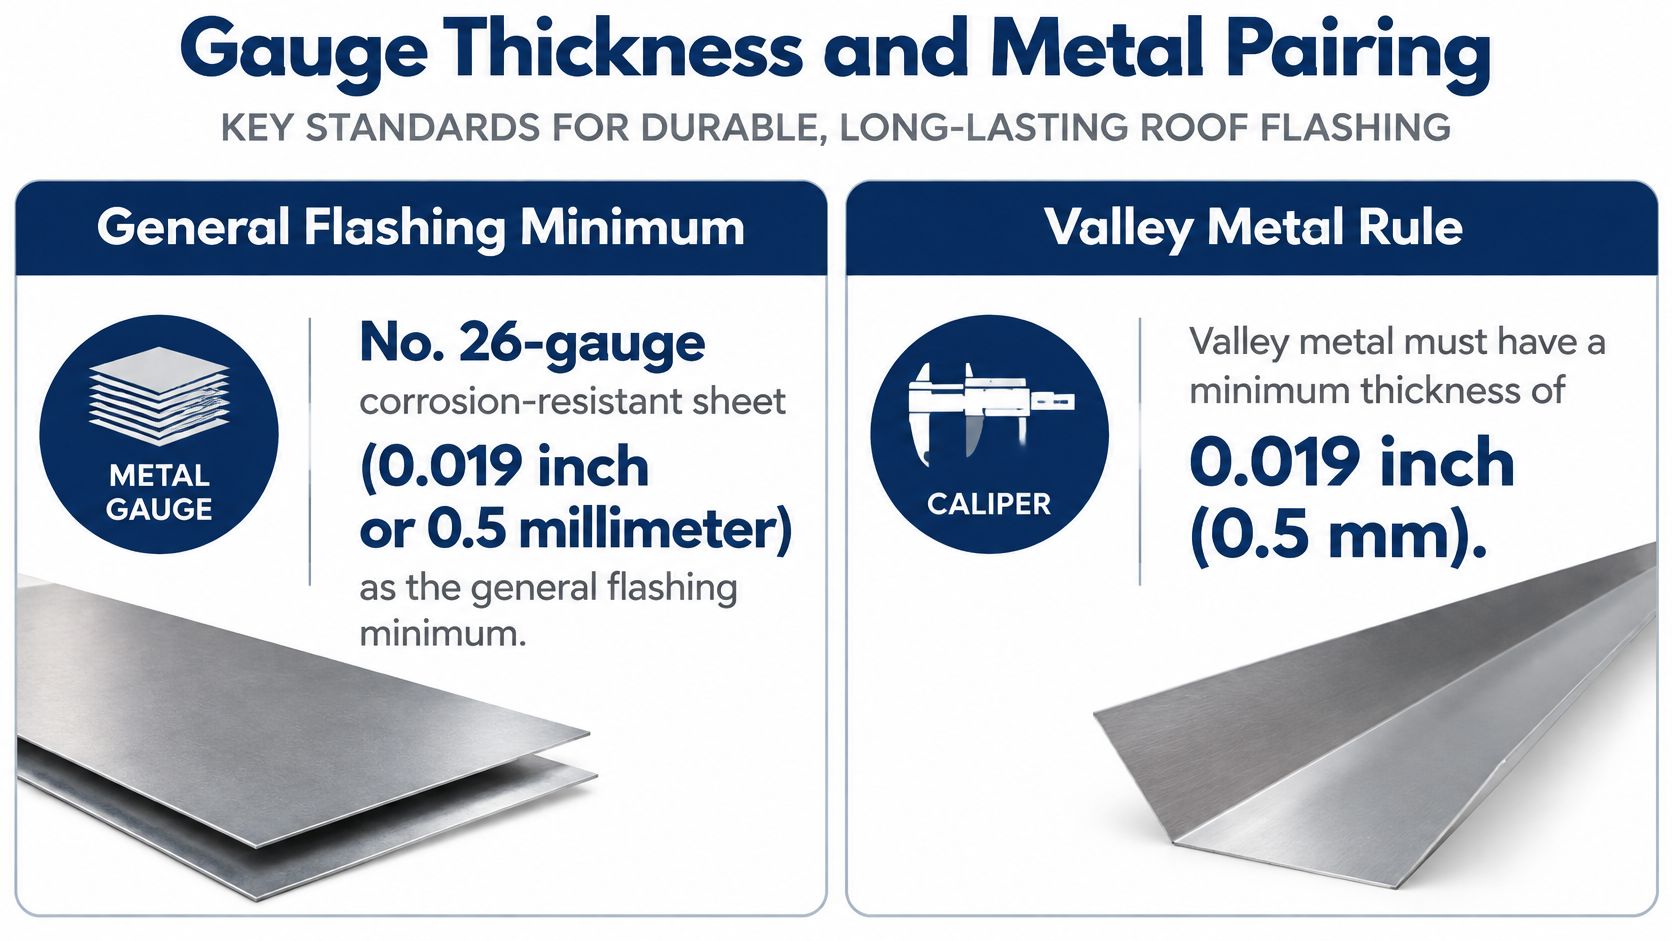
The 2024 International Residential Code roof-assembly provisions specify corrosion-resistant base flashing at a minimum nominal thickness of 0.019 inch, approximately 0.5 millimeter, and identify 15 inches, or 381 millimeters, as a valley-flashing width minimum in the cited provisions. The table's coverage dimensions are duty-specific references, not a universal flashing specification.
Read the minimum by the junction
The valley entries require particular care. The overall-width provision and the provision calling for coverage on each side of a raised center rib belong to particular roof assemblies. Don't select whichever produces the cheapest blank, and don't assume a model-code excerpt establishes what every DFW municipality currently enforces.
Likewise, base flashing names a function rather than a single shape. A bent wall transition, fabricated curb pan, and chimney apron can each serve as base flashing. Their upper edges still need protection appropriate to the wall assembly.
The table separates apron from continuous because location and installation matter. An apron crosses a headwall or chimney face. A continuous sidewall run extends along a sloping junction and has different drainage, movement, and replacement concerns.
Match the stain to a component
Across Fort Worth, Arlington, Keller, North Richland Hills, and Forest Hill, with Dallas as the other regional anchor, the useful question isn't just whether a house has a metal roof. It's whether the leak occurs at a wall, valley, roof opening, or discharge point.
- Stain beside a chimney: Inspect the base-to-counterflashing relationship, not just the visible roof covering.
- Wet siding at an eave: Find the kickout and establish where it discharges.
- Leak below an intersection: Examine valley geometry, laps, and nearby fasteners.
- Drip around a pipe: Check both the roof flange and the seal around the pipe.
A ceiling stain can sit downhill from the actual opening. Trace moisture on the underside of the deck before choosing a repair.
Name the piece first. Then concentrate on the relevant detail rather than treating every stain as evidence that the entire roof needs replacement.
How the Flashing Categories Fit Together
Consider a gabled house in Fort Worth, Benbrook, or Burleson with a dormer, a valley, and a plumbing vent. The crew needs to organize the flashing by its job before cutting metal. Otherwise, a perfectly formed piece can terminate against the wrong layer.
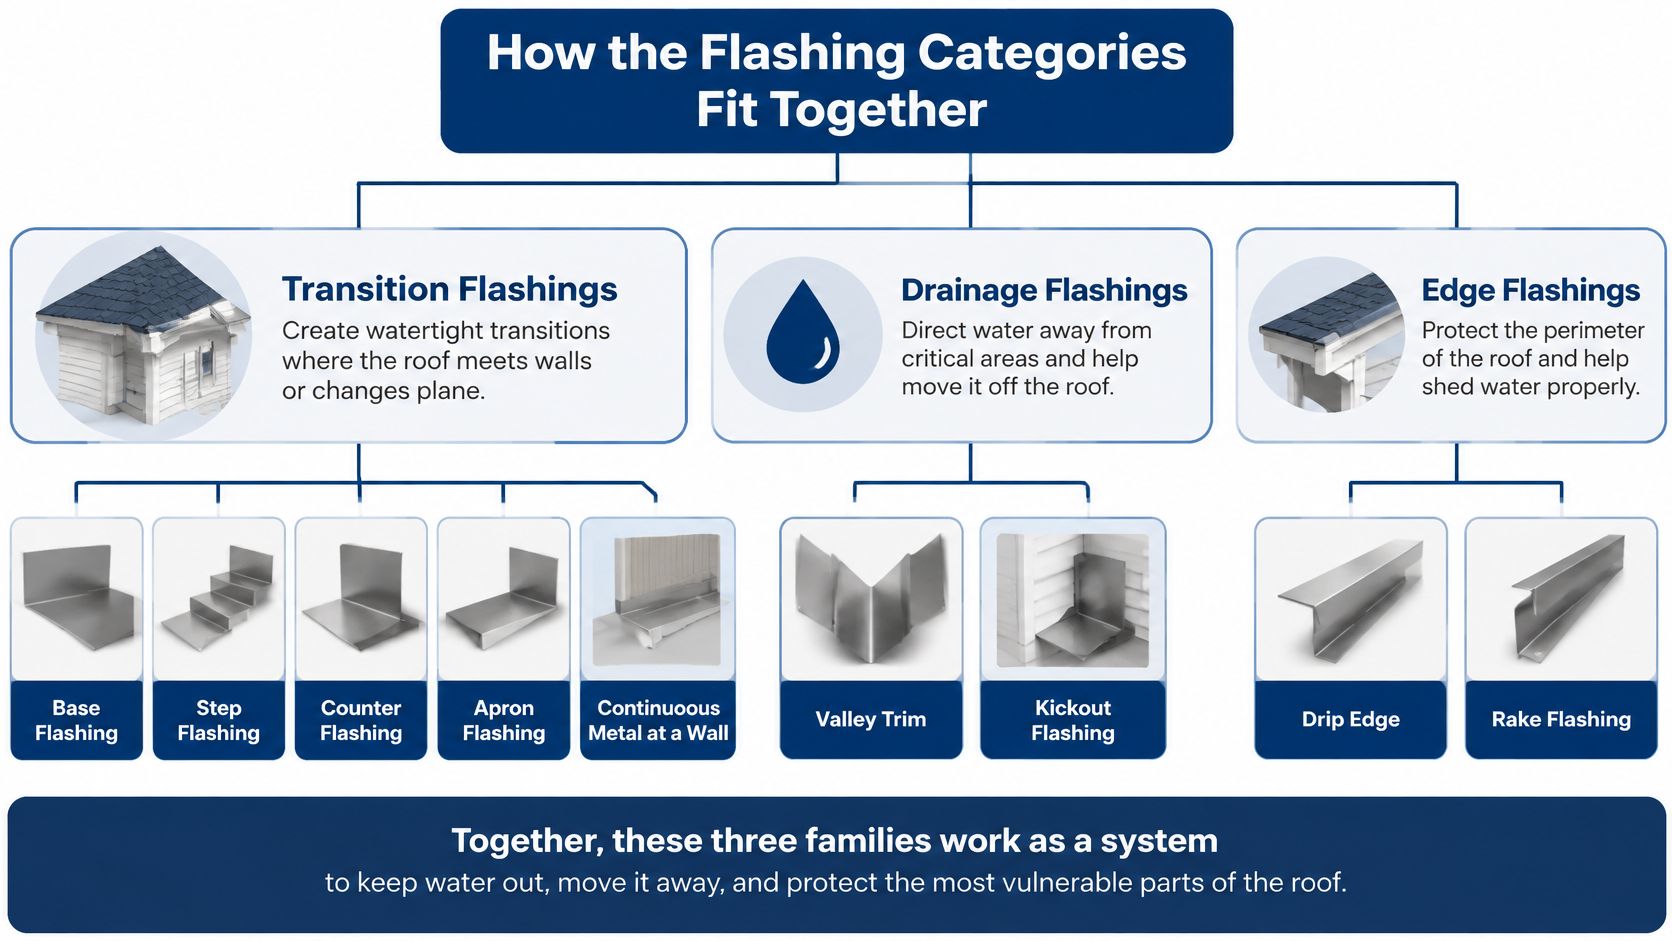
Transition flashings connect roof surfaces to walls and curbs. Base, step, counter, apron, and continuous metal belong here. Drainage flashings, principally valley trim and kickout diverters, collect or redirect concentrated runoff. Penetration flashings provide fitted flanges, pans, and collars around openings.
The diagram also identifies perimeter protection. Drip edge and rake trim protect roof boundaries, but neither replaces a wall transition or a pipe boot.
Follow the drainage route
Rain entering a valley gathers runoff from adjoining slopes. Where the roof geometry sends that runoff toward a sidewall, the wall detail must return it to the exposed roof surface rather than funnel it beneath the covering. At the bottom of that sidewall, a kickout turns the discharge away from the wall.
Those functions connect, but they're not interchangeable. A generous valley doesn't compensate for a missing diverter, and a large kickout can't rescue water that already entered behind the wall flashing.
Practical rule: Every flashing piece needs a protected entrance, a clear drainage surface, and a deliberate exit.
On a typical water-shedding assembly, the installation progresses from underlayment to the appropriate base, valley, or course-integrated flashing, then through the roof covering and the wall-side cap or siding overlap. Local laps must follow the assembly detail. A penetration flange, for example, may sit beneath the upslope covering while discharging over the downslope covering.
Leave room for independent movement
A brick wall and a wood or metal roof deck don't behave as a single rigid structure. Temperature changes and building movement can pull against metal that's locked to both surfaces. Separate base and counterflashing let the roof-side component move without opening the wall-side protection.
Say a two-story sidewall in North Richland Hills has every step piece present but no effective cap over their vertical legs. Wind-driven rain can enter over the tops even though the course-by-course drainage looks correct from below.
- Wall-transition concern: Examine the cap, vertical coverage, and movement arrangement.
- Drainage concern: Identify the collection channel and final discharge.
- Opening concern: Check the fitted assembly around the penetration itself.
Use the junction's function to choose the detail. Shape alone isn't enough.
Step Counter Apron and Continuous Details
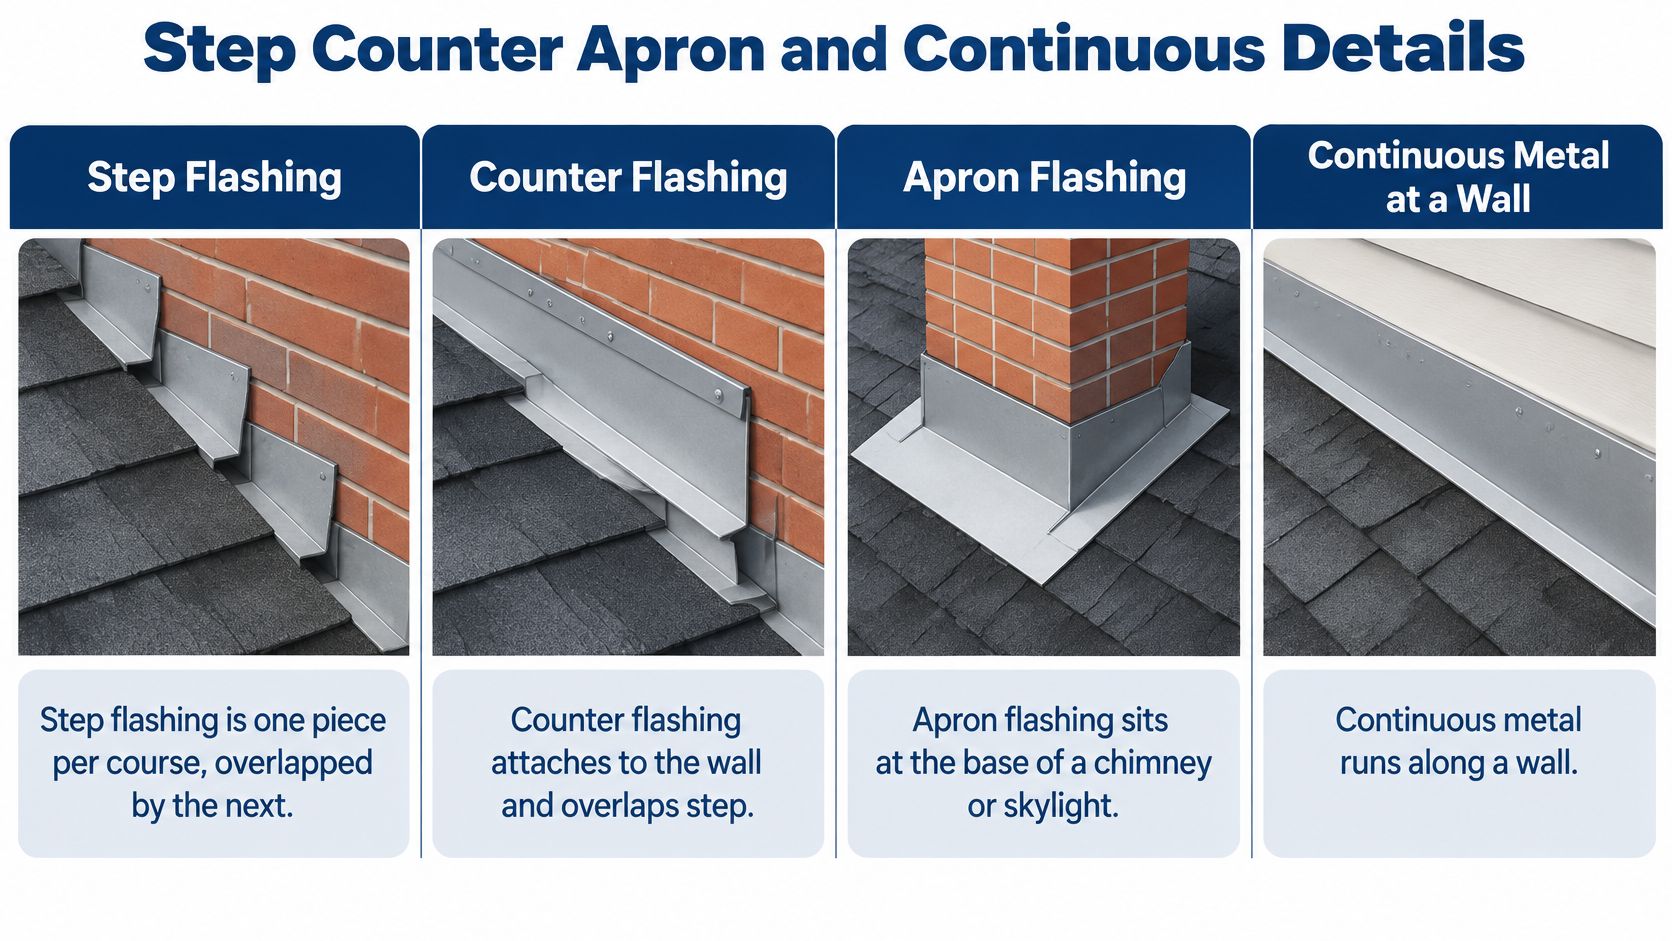
Step flashing is a course-by-course assembly, not a long angle tucked beside the wall. On shingled houses in Fort Worth, Arlington, Mansfield, and Southlake, that distinction affects both leak resistance and future repair access. Metal panels need their specified wall detail rather than an automatic copy of a shingle installation.
The NRCA wall-flashing guidance specifies a minimum 2-inch, or 51-millimeter, step overlap, approximately 4 inches, or 102 millimeters, up the wall, and at least 2 inches, or 51 millimeters, onto the roof, with 4 inches preferred in severe climates. For the continuous detail, it calls for coverage of at least 4 inches onto both surfaces, a hook edge with cleats at 12-inch, or 305-millimeter, centers, and 6-inch, or 152-millimeter, flow-direction laps.
Build the step run from the bottom
Use a folding tool or sheet-metal brake to make clean bends, and remove sharp burrs before placing metal against underlayment. Trial-fit the lower termination before weaving the run. A good sequence is:
- Set the lowest piece for the kickout connection. Leave a clear discharge route rather than burying the lower end behind siding.
- Weave each succeeding piece with its roofing course. The upslope piece must overlap the lower piece so runoff stays outside.
- Keep fastening out of the water path. Secure each step at its upper wall-side corner, not through the exposed water-shedding leg.
- Cover the vertical legs. Install the intended siding overlap or separate counterflashing without pinning together components that need independent movement.
Don't hammer a distorted piece flat and assume it's restored. A crease through the drainage leg or a torn fastener hole can remain a leak path after the metal looks straight.
Give counterflashing its own attachment
Counterflashing protects the upper edge of the base or step metal. It isn't merely another strip laid over a bad seam. On masonry, let the cap into a suitable reglet or mortar joint and secure and seal that termination.
A surface bead across the face of brick leaves the entire assembly dependent on adhesion at an exposed edge. The embedded termination provides a physical interruption to water running down the wall.
Keep the lower cap edge arranged to shed over the base flashing. Don't seal drainage exits indiscriminately, and don't drive fasteners through both layers merely to stop a loose edge from rattling.
Apron and continuous work have different demands
An apron handles the headwall or chimney-front transition. Its roof leg must integrate with the covering so water drains out onto the roof. Continuous sidewall flashing serves a longer sloping junction on suitable profiled tile and selected roof assemblies; the cited continuous detail is installed before the covering.
The trade-off is serviceability. Step pieces can accommodate localized movement and selective replacement, while a continuous run needs deliberate laps, cleats, and expansion provisions. Debris lodged against a raised covering edge can also obstruct drainage and expose a poorly detailed continuous junction to wind-driven rain.
On a Fort Worth gable, a torn step piece may be accessible by carefully releasing the adjoining roofing course and wall covering. That's a targeted repair. Replacing it shouldn't require opening a sound wall run because someone previously fastened everything together.
Valley Trim and Kickout Flashing
Valley trim controls concentrated flow; kickout flashing controls the last turn away from the wall. Both deserve inspection before siding or counterflashing hides their connections. Their most important features are the channel geometry and the landing point, not the paint color.
For scale, RoofPredict's 2026 flashing example describes a 1,200-square-foot roof with four valleys requiring 160 linear feet of valley flashing. That's an example, not an estimating ratio. Measure the actual intersections and account for the specified laps rather than ordering valley stock from roof area alone.
Keep the valley channel open
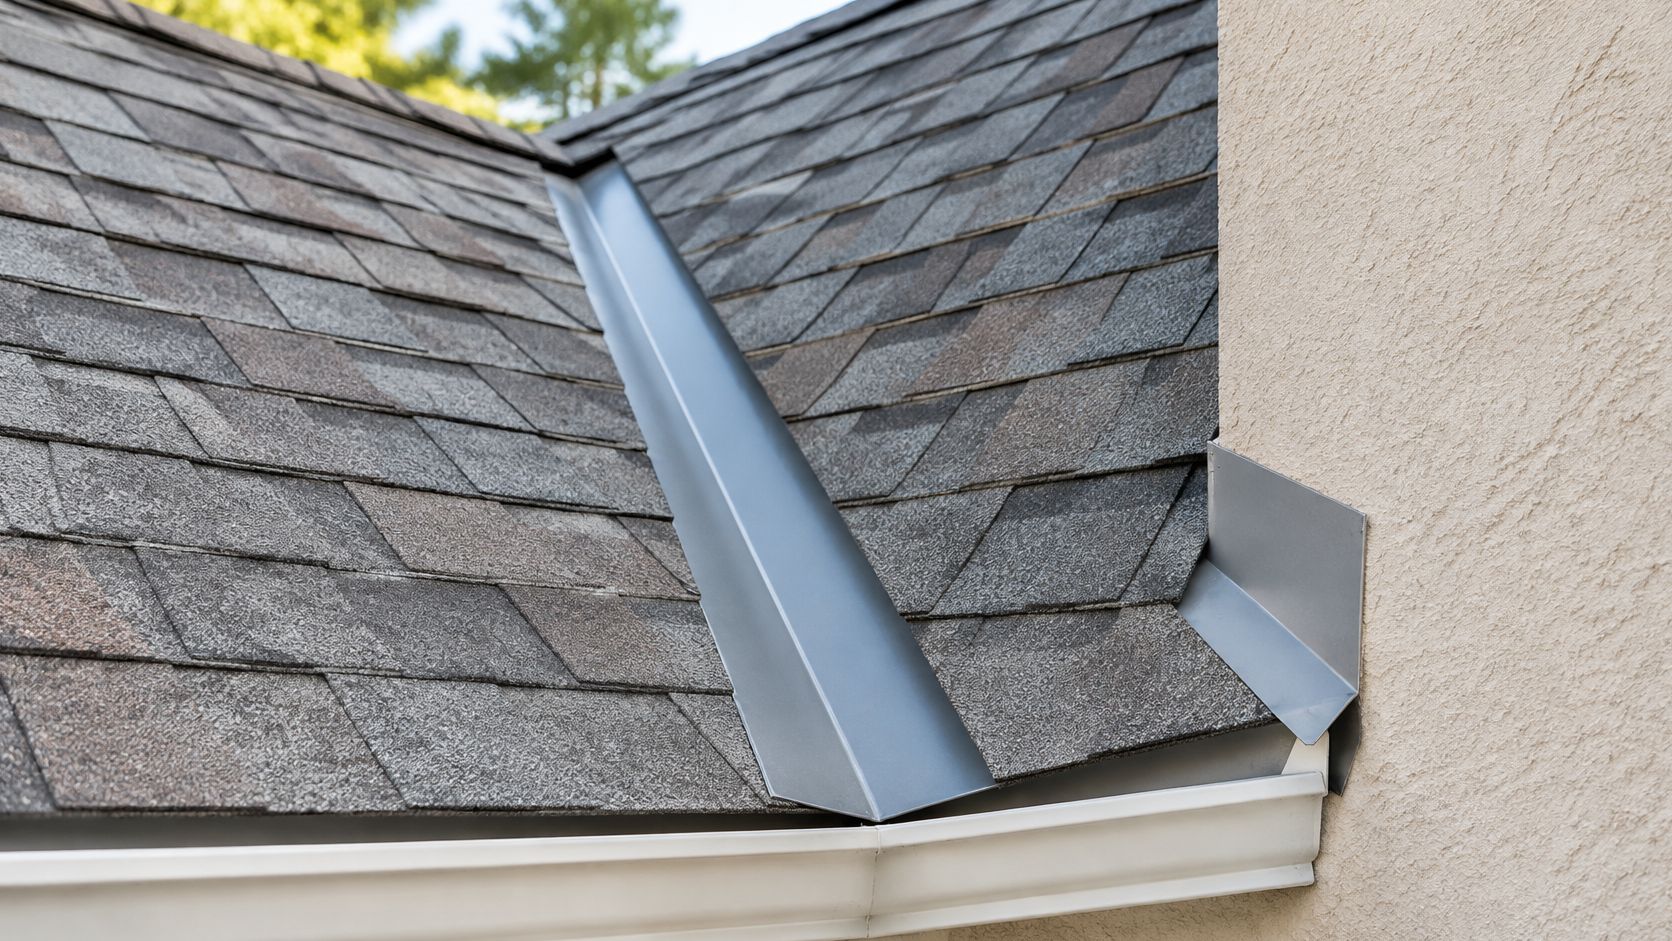
Use corrosion-resistant valley metal compatible with the roof covering. Select its width and center-rib configuration for the applicable roof assembly, rather than substituting a narrow flat strip because it fits beneath the panels.
The raised rib limits splash and cross-flow from the opposing slope. On an open metal valley in Denton or Lewisville, mitered panel ends must leave that rib unobstructed. A panel edge bridging the center creates a debris snag and can undermine the intended drainage channel.
Look closely at the fabrication and attachment:
- Panel cuts: Remove swarf and sharp offcuts so they don't remain in the channel or damage protective finishes.
- Fasteners: Keep attachments out of the active drainage area and follow the roof-system valley detail.
- Laps: Arrange the upper section over the lower section, with compatible joint materials where specified.
- Outlet: Confirm the valley drains onto the intended roof edge or collection point without running behind adjacent trim.
A valley doesn't need to look dramatic to be wrong. A flattened rib, reverse lap, or obstructed outlet can matter more than a conspicuous dent away from the water path.
Land the kickout inside the gutter
The kickout is the final piece of a sidewall run. Its outlet should send water into the gutter trough, not onto the gutter's back edge or into the narrow space behind it. Check the wall-side attachment and the open mouth together.
After a Fort Worth downpour, staining at the siding corner can indicate a discharge problem. It doesn't establish whether the cause is a missing kickout, a crushed diverter, gutter obstruction, or a hidden wall defect. Trace the route before adding sealant.
A diverter is only useful if the water lands on a surface designed to receive it.
Where the sidewall ends above a lower roof, land the discharge on the lower roof's flashing or water-shedding assembly, never exposed sheathing. That connection needs room for runoff to spread without entering a seam.
Confirm the valley outlet and kickout landing while the work is open. Once siding covers the wall leg, correcting a poor termination can require removing otherwise sound exterior finishes.
Gauge Thickness and Metal Pairing
A thicker sheet and a better-shaped detail solve different problems. In relevant applications, the NRCA materials guidance identifies 0.032-inch, or 0.81-millimeter, metal, about 68 percent thicker than 0.019-inch sheet. It also lists 24-gauge galvanized or prefinished galvanized steel and stainless steel for channel or step work, while the cited G90 valley provision uses a minimum uncoated thickness of 0.0179 inch, approximately 0.455 millimeter.
Those distinctions matter when comparing a light code-minimum piece with a fabricated detail intended to remain in a long-life roof. Don't compare gauge labels across different metals as though they were a universal thickness scale.
Flashing metals, minimum thickness, and pairings
| Metal | Thickness cited | Pair with | Avoid |
|---|---|---|---|
| Galvanized or prefinished steel | 0.019 inch general minimum; 24 gauge for many step details | Asphalt shingles and painted steel | Bare copper contact |
| G90 zinc-coated valley steel | 0.0179 inch uncoated minimum | Compatible roof covering required by the applicable provision | Copper-bearing runoff and unapproved dissimilar-metal connections |
| Stainless steel | 24 gauge listed for step and channel work | Slate, tile, and long-life walls | Unisolated dissimilar-metal connections |
| Heavier specialty sheet | 0.032 inch in relevant NRCA applications | Custom details requiring the specified stiffness and fabrication | Using thickness as an excuse to skip laps |
| Copper | Project-specified sheet weight and fabrication detail | Copper roofs, slate, and soldered pans | Aluminum, bare galvanized steel, and unisolated treated wood |
| Aluminum | Roof-system-specified thickness | Matched painted residential trim | Copper, mortar, and unisolated dissimilar contact |
Specify the entire contact system
Compatibility includes fasteners, clips, substrate, and runoff, not just adjoining sheets. Copper, aluminum, galvanized steel, stainless steel, mortar, and treated wood can't be mixed casually. Water draining from an incompatible metal can create trouble even when the sheets don't touch directly.
Specify same-family fasteners where appropriate, or an explicitly approved compatible fastener system. Don't assume a painted screw head makes the shank suitable for the flashing beneath it.
The SMACNA Architectural Sheet Metal Quality Assurance Guide addresses fabrication, installation, fasteners, soldering, underlayments, and condition assessment as parts of architectural sheet-metal work. The practical implication is to detail the assembly, including isolation layers and expansion provisions, instead of specifying only a metal name.
Choose service life and restraint together
For slate and historic tile, I'd favor copper or stainless flashing over light galvanized steel. Removing durable roofing to replace prematurely failed metal is a poor place to save on sheet stock.
Heavier sheet can resist handling damage and deformation, but it still needs controlled movement. Space and locate attachments to prevent flutter or oil-canning from stressing the joints without rigidly trapping a long run.
Use sealant at designed joints, not as a substitute for drainage geometry. For a painted standing-seam house in Dallas or Fort Worth, start with compatible prefinished flashing made for the panel system. For copper or slate work, select a long-life metal and fabrication method suited to that assembly rather than borrowing ordinary painted trim.
Which Piece Each Junction Needs
A repair description should name the junction, primary flashing, and companion piece. “Chimney leak” is too broad to price or repair reliably. “Chimney-side step flashing with an open counterflashing termination” gives the crew a specific assembly to examine.
For houses in Fort Worth, Euless, Bedford, and Flower Mound, use the junction itself as the lookup. The failure column identifies a likely route or symptom, not a diagnosis based on staining alone.
Junction, required flashing, and the leak if it is skipped
| Junction | First piece | Companion | If companion is skipped |
|---|---|---|---|
| Sidewall course | Step flashing | Siding lap or counterflashing | Leak at course lines |
| Headwall | Apron or continuous | Counterflashing | Leak along the top course |
| Sidewall at the eave | Step run | Kickout into the gutter | Rot behind siding and fascia |
| Open valley | Valley trim with rib | Matched underlayment and adequate width | Water crosses the valley or enters beneath its edges |
| Chimney front | Apron | Counterflashing in the joint | Face stain under the chimney |
| Chimney side | Step flashing | Counterflashing | Side leak into the chase |
| Pipe, vent, or curb | Purpose-made flange or pan | Collar, boot, or counterflashing | Leak at the opening |
| Sound slate or tile field | Copper or stainless base | Matching counterflashing | Premature base-metal failure beneath serviceable roofing |
Distinguish a missing companion from damaged base metal
An intact primary piece doesn't prove the assembly is complete. At a headwall, examine how the upper edge is protected before blaming the apron. At a pipe, inspect the collar as well as the flange-to-roof integration.
Chimneys require a wider view. The front apron and side steps have different jobs, and the upslope side needs an appropriate back-pan or cricket arrangement for the roof geometry. Repairing the visible front won't correct an opening behind the chimney.
- Course-line symptoms: Check individual pieces, overlaps, and the wall covering above them.
- Opening-centered symptoms: Examine the fitted collar, curb, or boot and its connection to the roof.
- Corner deterioration: Inspect the discharge point and concealed wall materials before ordering roof-field replacement.
Write a scope around the failed connection
The useful repair scope identifies what must be temporarily removed, what can remain, and which concealed connection needs exposure. “Seal flashing” doesn't establish any of those boundaries.
For a sound slate or tile field, plan access carefully so the surrounding covering can be lifted and reinstated without unnecessary breakage. The goal is a durable replacement connection beneath roofing that still performs, not a cosmetic patch over deteriorated metal.
Scope test: If the estimate names a flashing piece but not what covers it or receives its discharge, the junction may not be fully accounted for.
Find the junction in the table, then use the relevant installation detail only where dimensions or sequence remain unresolved. Don't prescribe a complete roof replacement from the symptom column alone.
Fort Worth and Nearby City Checks
Start with Fort Worth, then nearby communities including Arlington, Benbrook, Burleson, Euless, Everman, Forest Hill, Keller, Mansfield, North Richland Hills, Saginaw, Southlake, Bedford, and Roanoke. Continue through Dallas, Denton, Lewisville, Flower Mound, Carrollton, Frisco, McKinney, Garland, Richardson, Mesquite, Cedar Hill, DeSoto, Duncanville, and Rockwall. The Texas Department of Transportation's Dallas–Fort Worth Metroplex map shows the connected geography behind that inspection route.
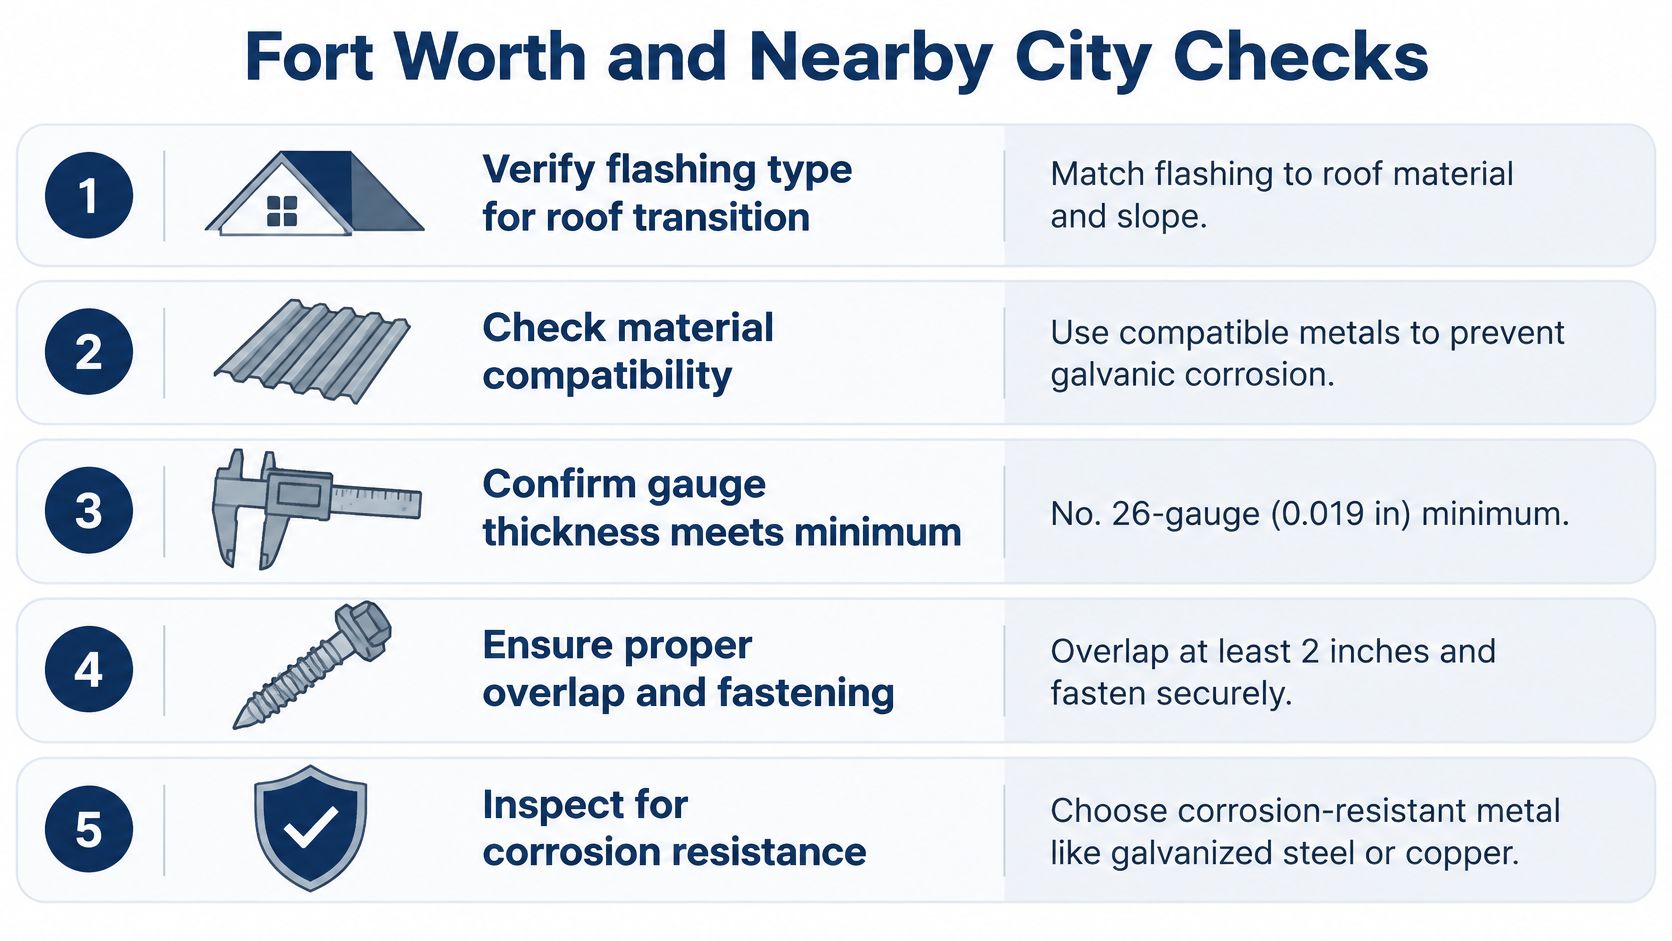
The city name doesn't create another flashing type. Roof covering, wall construction, geometry, and applicable local requirements determine the detail. Run the same checks in each community rather than assuming a nearby address means an identical assembly.
Document the junction before it disappears
- Name the junction. Record whether it's a sidewall, headwall, valley, chimney, or penetration. Photograph the wider roof geometry as well as the suspect seam.
- Confirm the metal family. Check the flashing specification, coating, fasteners, and adjacent materials. Color alone doesn't identify the substrate or thickness.
- Measure the lap. Use a tape measure on accessible open work and record the result against the applicable assembly detail.
- Find the diverter. Establish where concentrated runoff leaves the wall or valley and what receives it.
- Photograph the open seam. Capture concealed overlaps and wall-side connections before siding or counterflashing closes them.
These are crew-level checks. Homeowners can document visible symptoms from the ground or a safely accessible attic; roof access and opening concealed work belong to trained personnel using appropriate fall protection.
Separate storm damage from existing defects
After hail, examine bruised step legs, distorted valley ribs, and damaged protective finishes before attributing every leak to shingles. A dent by itself doesn't prove a drainage failure. Look for a corresponding tear, displaced lap, puncture, or obstructed channel.
After wind-driven rain, concentrate on headwall aprons and chimney counterflashing, especially against two-story walls. Note wind exposure and where moisture first appeared indoors, but don't assume the ceiling stain sits directly beneath the entry point.
- Gutter-ended sidewalls: Confirm the kickout still reaches the trough and remove debris that could obstruct discharge.
- Localized step damage: Inspect neighboring pieces in the same course before treating the defect as isolated.
- Freshly covered work: Preserve photographs of hidden laps so later inspections don't depend on guesswork.
Record conditions before temporary repairs alter the evidence. That helps distinguish storm-created openings from older corrosion, installation defects, and maintenance problems.
Repair or Reflash the Junction
Repair a piece when the defect is isolated and the surrounding assembly remains sound. Reflash the junction when its geometry, material, or companion pieces are wrong. That distinction keeps a small repair from becoming an unnecessary tear-off and prevents repeated patching of an assembly that never drained correctly.
A torn step piece, loose counterflashing section, or bent kickout may justify selective work if the roof field is serviceable and the metal remains compatible. The repair still needs access to the actual connection. Smearing sealant over the visible symptom isn't equivalent to replacing damaged metal.
When a local repair makes sense
A targeted repair is reasonable when the crew can expose the defect, preserve adequate surrounding laps, and reconnect the water path without relying on deteriorated material. Check the substrate while it's open. Soft sheathing or damaged wall backing may expand the scope even when the visible metal defect is small.
Repair documentation should distinguish the original damage from what the crew removed for access. That matters when siding, roofing courses, or trim must be temporarily lifted to reach an otherwise localized failure.
- Keep serviceable material: Preserve sound roof covering where access allows proper reconstruction.
- Replace compromised connections: Don't reuse torn attachment holes or heavily corroded edges.
- Verify the finished route: Confirm that runoff leaves the repaired piece without entering another concealed joint.
When the whole junction needs rebuilding
Reflash where laps are inadequate, valley geometry doesn't suit the assembly, galvanized metal has failed beneath long-life roofing, or exposed sealant is the only effective headwall barrier. Multiple missing companions usually indicate an assembly problem rather than an isolated defect.
On a sound slate roof, failed flashing doesn't justify tearing off good stone. Copper pans and transitions with locked, soldered seams require proper fabrication and field fitting, not a sealant-only repair. Full roof tear-off is a separate decision based on the condition of the covering and underlying assembly.
At Blue Lake Roofing & Remodeling, our own crews handle roof repairs for leaks, missing shingles, and damaged flashing, as well as junction reflashing across Fort Worth, Arlington, Dallas, Denton, and surrounding communities. When slate remains sound, we reflash without tearing off the field; for copper work, we cut, bend, and lock pans, flashings, and transitions on site, then hand-solder the seams watertight.
Arrange an on-site inspection when several companion pieces have failed or hail may have opened laps beneath intact paint. Prepare ground-level and safely accessible photographs, identify the metal if known, and include the storm date and insurance-claim notes where relevant. Don't climb onto the roof to obtain close-ups.
Blue Lake Roofing & Remodeling offers flashing repair, junction reflashing, and custom metal work for roof-to-wall connections, valleys, chimneys, and penetrations. Visit Blue Lake Roofing & Remodeling to arrange a free on-site inspection and estimate, and share photos of the affected junction so our crew can assess whether it needs a targeted repair or a rebuilt flashing assembly.
