
Commercial Flat Roof Repair: The Complete 2026 Guide
The warehouse crew arrives in Fort Worth to find water on the pallets and a ceiling tile sagging above the loading aisle. Someone wants to grab roofing cement and patch directly over the drip. First, protect the inventory, keep people away from wet electrical equipment, and photograph the damage. The visible leak is a symptom, not a reliable map of the opening.
Good commercial flat roof repair starts by separating a membrane defect from failed flashing, blocked drainage, equipment condensation, or a structural problem. That distinction determines whether you need a compatible patch, a rebuilt detail, or work that no surface sealant can accomplish.
Table of Contents
- Diagnose a Fort Worth Flat Roof Leak Before You Patch
- How to Trace a Flat Roof Leak Step by Step
- When Ponding Water and Drains Cause the Leak
- How to Patch TPO, EPDM and Modified Bitumen Membranes
- How to Repair Open Seams and Failed Flashing
- Prevent the Next Leak on Fort Worth Commercial Roofs
- Choose Repair or Replacement in Fort Worth and Nearby Cities
Diagnose a Fort Worth Flat Roof Leak Before You Patch
Use the interior evidence to organize the investigation, not to authorize a patch. The following leak triage for flat commercial roofs gives your maintenance team a starting point. Roof-level checks belong to trained personnel with safe access and fall protection.
| Where water shows | Likely roof source | First move today | Call a roofer when |
|---|---|---|---|
| Ceiling stain near an exterior wall | Perimeter flashing, parapet or scupper failure | Photograph, then inspect edge metal and scuppers | Flashing is loose, rusted or pulled away |
| Stain under a rooftop HVAC unit | Curb flashing, condensate drain or duct penetration | Check curb sealant and clear the condensate line | Sealant is cracked or the curb sits low |
| Stain in the middle of the roof field | Membrane puncture, open seam or blister | Mark the spot and trace the water path upslope | Ponding, a soft deck or many open seams |
| Several new stains after heavy rain | Clogged drains or scuppers causing ponding | Clear all drains and watch flow in the next rain | Water still stands 48 hours later |
| Stains appear right after a hailstorm | Hail punctures, cracked modifier or shattered surfacing | Photograph every hit for the insurance file | Hail hits are widespread across the field |
| Stain grows slowly over months | Aging membrane, shrinkage or wet insulation | Schedule a thermal or nuclear moisture survey | Moisture scan confirms saturated insulation |
Commercial flat roofs are more accurately called low-slope roofing systems. A U.S. government roofing research plan estimated their national inventory at approximately 25–30 billion square feet, with annual applied costs exceeding $10 billion. Managing leaks is an ordinary property-management responsibility, but treating every leak as the same repair isn't.
Make the building safe before investigating
Move vulnerable stock and equipment out of the affected area. Isolate slippery floors, and have qualified personnel address electrical exposure. Don't stand beneath a bulging ceiling or send someone onto a questionable deck to get a better photograph.
Record whether the leak starts during rain, continues afterward, or appears while rooftop equipment operates in dry weather. An HVAC condensate problem can resemble a roofing failure, and the wrong diagnosis sends the wrong trade to the job.
Triage rule: A soft roof surface, visible sagging, or moving edge metal is a stop-work signal, not an invitation to inspect more closely.
For properties in Fort Worth, Dallas, and Arlington, photograph interior damage before anyone walks the roof. Include a wide view showing the room or warehouse bay and close views of affected finishes, equipment, and inventory. Those reference points help the roofer connect interior evidence to the roof plan without confusing separate leaks.
How to Trace a Flat Roof Leak Step by Step
A defensible investigation produces a mapped cause, not just a wet spot circled on a photograph. Keep the roof file, interior observations, and exterior findings together so the repair scope follows the evidence.

Follow the water and verify the source
Review the roof file. Identify the membrane, installation history, warranty terms, assembly, and previous repairs. Old patch locations identify areas worth investigating, but they don't prove the current entry point.
Survey the interior first. Locate stains against columns, exterior walls, equipment curbs, and drains on a simple drawing. Separate active dripping from old discoloration so the crew doesn't chase an unrelated historical leak.
Inspect the dry roof systematically. Work in lanes through the field, seams, penetrations, perimeter, and drainage details. Use appropriate fall protection, stay clear of unprotected skylights, and don't send anyone alone onto a wet membrane.
Trace concealed travel paths. Where safe, remove accessible ceiling tiles and follow water marks along deck flutes, conduit, beams, and ductwork. Water can enter away from the eventual drip, so inspect upslope and laterally rather than assuming a vertical path.
Investigate hidden moisture. Use infrared imaging or a nuclear moisture survey where appropriate, especially around older repairs. These tools identify suspect areas, not necessarily the precise breach; confirm findings with suitable material checks or authorized core cuts.
Map and photograph every defect. Mark locations with a membrane-compatible marking method, assign identifiers, and record them on the roof drawing. Photograph the condition before disturbance, during authorized removal, and after completion.
Protect the warranty and the record
FM Global's roofing guidance recommends inspections at least semiannually, plus before and after high-wind, heavy-rain, or hail events. Coordinate with the membrane manufacturer or warrantor before cutting or removing warranted roofing, because a warranty-preserving reinspection may be required.
The facility manager should also name who can approve exploratory openings and additional work. Otherwise, a crew may discover wet materials and lack authorization to remove them, leaving the building dependent on temporary protection.
After a DFW spring hailstorm, document conditions before repairs obscure them, whenever immediate safety and emergency protection allow. Keep observed impact damage separate from deterioration and old repairs. An honest insurance record explains what was damaged, what was protected temporarily, and what permanent work remains.
When Ponding Water and Drains Cause the Leak
Use 48 hours after rain ends as an escalation checkpoint for standing water, not as proof that a roof is sound before that point. Check sooner when water is deepening, approaching equipment curbs, or accompanying interior leaks. Drainage symptoms need investigation even when the membrane looks intact.
| What you observe | Likely cause | Fix | Typical scope |
|---|---|---|---|
| Water gone within 24–48 hours of rain ending | Normal low-slope drainage behavior, subject to system requirements | No corrective work if other conditions are sound; keep drains and scuppers clear | Routine maintenance |
| Puddles still standing 48+ hours after rain | Clogged drain, scupper or strainer | Clear debris and verify flow in the next rain | Same-day maintenance when blockage is the cause |
| Puddles in the same spots every storm | Inadequate slope or deck deflection | Tapered insulation, crickets or added drains after assessment | Contractor project |
| Membrane soft, bubbling or separating near drains | Suspected saturated insulation under the ponding zone | Moisture survey, then targeted insulation replacement if confirmed | Contractor project |
| Leaks return at the same drain after repairs | Failed drain flashing or clamping ring | Re-flash the drain bowl and replace a defective clamping ring | Contractor repair |
Separate an obstruction from a geometry problem
A blocked strainer and a depressed deck can produce similar puddles, but their remedies aren't interchangeable. Clearing debris restores an obstructed flow path. It won't make water run uphill out of a low area.
Inspect every drain, scupper, and low point serving the affected zone. Check where the discharge goes, too. Don't assume that removing leaves from the roof-level opening proves the connected piping is clear.
If water returns to the same depression, assess insulation condition and roof geometry. A roofer can design crickets or tapered insulation to redirect flow; suspected deck deflection calls for structural evaluation before adding materials or changing drainage.
The cheapest visible patch can be the most expensive choice when it leaves the reason for repeated water entry untouched.
For a DFW warehouse, retail center, or multifamily building, compare repair scope against damaged goods, tenant disruption, cleanup, and repeat mobilization. A patch over saturated insulation doesn't eliminate those exposures.
Include wind attachment in the diagnosis
The Insurance Institute for Business & Home Safety's 2025 research agenda describes investigations into commercial membrane-roof failures under high winds and whether code provisions adequately address low-slope membrane performance. That makes attachment and edge conditions relevant to the repair decision, not just the visible puncture.
Before approving work, require a cause-based conclusion: blocked drainage, failed drain detail, wet assembly, inadequate slope, or suspected structural movement. The proposed repair should correct that condition, with separate pricing for investigation and any contingent concealed work.
How to Patch TPO, EPDM and Modified Bitumen Membranes
Identify the membrane before buying a tube of anything. TPO and PVC may look similar from a roof hatch, but they aren't interchangeable. EPDM uses different bonding chemistry, while modified bitumen and built-up roofing require asphalt-compatible repair assemblies.
Historical market share isn't a substitute for identification. IIBEC's account of low-slope roofing trends reports built-up roofing at 45.7% in 2000, later approximately 6% of new construction and 9% of reroofing, while TPO rose from 11.6% in 2001 to approximately 40% and 30%, respectively, in the cited NRCA survey data; it also notes that most pre-2008 TPO was 45 mil, with 60-mil membranes becoming more common afterward.
The Freedonia Group reports U.S. commercial roofing demand of 83.2 million squares in 2024, projected to reach 85.2 million squares by 2029. That total doesn't establish the membrane on your building or prove which system will generate most repair calls.
Prepare sound material before bonding
Remove failed material as the repair detail requires, expose a sound bonding perimeter, and clean dirt and oxidation with the membrane manufacturer's approved cleaner. Dry the area completely and replace confirmed wet or unsound components rather than covering them.
Low-Slope Roofs and Sustainability reports that moisture-susceptible insulation can lose up to 80% of its insulating value when wet. A watertight surface patch can therefore leave a poorly performing assembly underneath.
For a localized TPO puncture, a trained membrane technician should:
- Cut matching TPO stock into a rounded patch sized to the manufacturer's repair detail.
- Clean and dry both bonding surfaces, checking that aged membrane can accept a reliable weld.
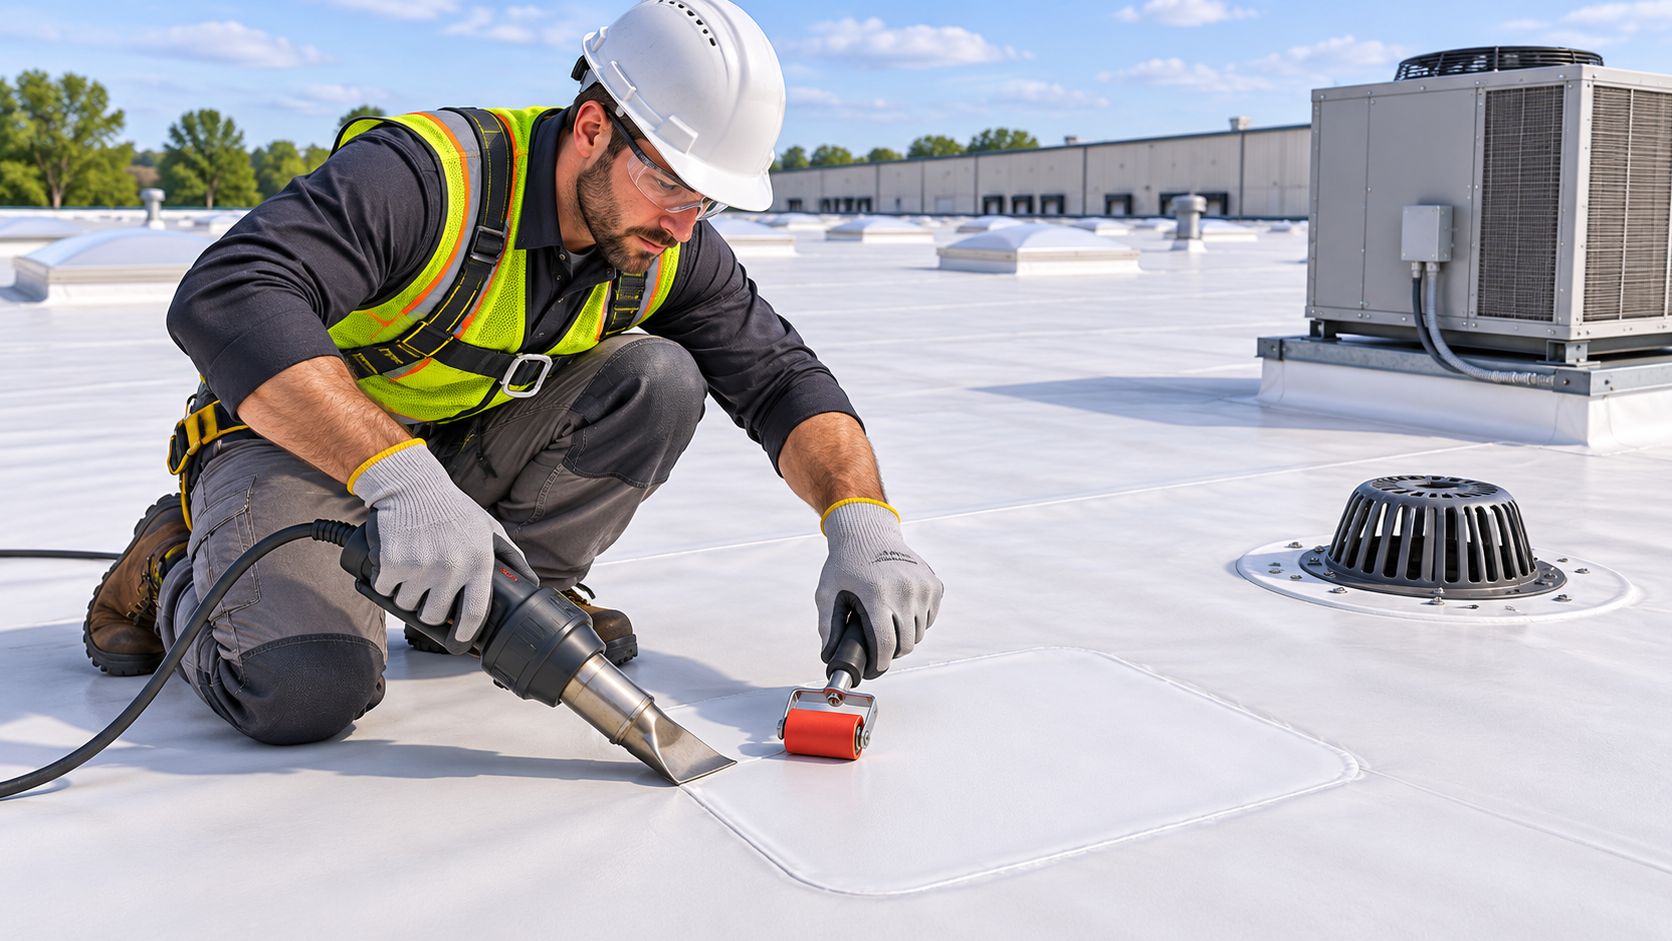
- Hot-air weld and roll the patch using a trial weld to establish suitable equipment settings.
- Let the weld cool, then probe the entire perimeter with a seam probe and correct discontinuities.
- Photograph the finished repair and record the product, location, conditions, and verification.
Match the repair to the chemistry
| Roof system | Typical defect | Correct repair | Key materials | Never do this |
|---|---|---|---|---|
| TPO | Field puncture or tear | Heat-welded TPO patch with a continuous weld | Compatible TPO stock, hot-air welder, silicone roller | Weld PVC to TPO or skip probing |
| PVC | Puncture or open lap weld | Heat-welded PVC patch | Compatible PVC stock, hot-air welder, roller | Mix TPO and PVC |
| EPDM | Puncture, tear or failed lap | Primer plus approved repair tape or liquid flashing detail | EPDM primer, repair tape, specified lap sealant | Try to heat-weld EPDM |
| Modified bitumen | Split, blister or open lap | Remove failed material and restore plies with compatible reinforced repair or cold adhesive | Mod-bit cement, reinforcing fabric, cold-applied adhesive | Torch near combustibles without safeguards |
| Built-up roofing | Localized split or failed patch | Remove failed material and rebuild plies | Compatible asphalt, ply felts, restored surfacing | Cover wet insulation or a soft deck |
Don't bridge active movement with a stationary patch. Generic caulk isn't a waterproofing system, and PVC won't form a proper TPO weld. North Texas temperature changes won't turn an incompatible repair into a durable one.
How to Repair Open Seams and Failed Flashing
Seams and flashings connect materials that move differently. At curbs, corners, drains, and parapets, the installer must maintain waterproof continuity through changes in direction while accommodating movement and attachment loads. Smearing sealant over those transitions doesn't rebuild them.
The image illustrates detail-level repair work; commercial low-slope assemblies still require their own membrane-specific flashing details.

Repair the full failed seam
Find the sound bond. Use a proper seam probe, not a sharp screwdriver that can puncture the sheet. Work gently beyond the visible opening to identify where adhesion resumes.
Open the failed length enough to remove contamination and assess the material. If the lap can't be restored reliably, use the manufacturer's approved cover-strip or replacement detail rather than forcing a weld onto unsuitable material.
Rebuild with the correct process. Re-weld suitable thermoplastic material after preparation, or re-prime and tape an EPDM lap with compatible products. Don't bury a contaminated seam under a bead of sealant.
Verify the entire repaired run after the appropriate cooling or cure period. Record its endpoints so a later inspector can distinguish the repair from the original seam.
Rebuild flashing instead of dressing the surface
Curbs and pipe boots. Remove hardened, cracked sealant where the detail calls for replacement, then inspect the underlying boot or flashing. A split boot needs repair or replacement, not another cosmetic bead.
At loose edge metal and coping, inspect cleats, fasteners, substrate, and membrane termination before refastening. Larger fasteners alone won't solve deteriorated blocking or an inadequate attachment detail.
Counterflashing and reglets. Restore mechanical engagement and the proper overlap over base flashing. Keep drainage paths open instead of packing every opening with sealant.
Use compatible factory corners and preformed accessories where appropriate. At curbs, avoid improvised folds that create fishmouths or leave unsupported material under tension.
Fort Worth summer heat makes exposed sealant condition worth checking closely. During North Texas wind events, corners and perimeter details also deserve particular attention because wind can exploit a loose termination and peel material beyond the original defect.
Acceptance check: An intact-looking bead isn't proof of a sound flashing assembly. Verify the attachment, overlap, corner treatment, and membrane transition.
Give every pipe, drain, conduit support, and curb its own entry in the repair log. Record whether it passed inspection, received a repair, or needs additional work. That prevents a crew from repairing the obvious HVAC curb while overlooking an adjacent conduit penetration.
Prevent the Next Leak on Fort Worth Commercial Roofs
A leak that comes back after repair usually means somebody patched a symptom. Water can enter at an open seam and travel along the deck before it shows up on a ceiling tile, so the stain that got patched last month may sit feet away from the true entry point. Prevention picks up where diagnosis ends: separate drainage and structural causes from membrane, seam, and flashing defects, correct the actual failure, then set a schedule that finds the next one early.
Schedule a spring and fall inspection for properties in Fort Worth, Arlington, and Dallas, with added checks after hail, high wind, or heavy rain. Assign responsibility to a named person and keep findings in the building's maintenance file. An inspection nobody acts on prevents nothing.

Use a repeatable maintenance checklist
- Clear drainage. Remove debris from drains, scuppers, and strainers, then verify discharge. Water still standing on the field days after a storm points to a slope or drain problem, and patching the membrane under it wastes money.
- Sample seams. Have a qualified technician probe representative areas and expand the inspection wherever a defect turns up.
- Inspect sealant and boots. Check curbs, pipe penetrations, and counterflashing for separation or cracking.
- Check perimeter attachment. Examine coping, edge-metal fasteners, and any loose components wind could lift.
- Review rooftop equipment. Confirm condensate drains freely and inspect equipment-curb transitions.
- Remove unnecessary loads and debris. A roof used for material storage collects punctures.
- Close the record. Log dates, locations, products used, weather, photographs, and outstanding actions.
The log supports warranty administration, insurance documentation, and capital planning. It also separates a new defect from an old maintenance item that never got resolved, which matters when deciding whether a warranty claim or a repair bill applies.
Upgrade only an assembly worth preserving
Spend on upgrades only when the roof assessment supports the investment. A reflective surface lowers membrane temperature and reduces cooling demand through a long North Texas summer, and on a sound assembly that can mean slower aging and fewer heat-related service calls. It won't correct saturated insulation, poor attachment, or inadequate drainage, and any coating has to be compatible with the existing membrane and its warranty. Where the budget only covers one project, drainage corrections and flashing reconstruction earn the money first.
Evaluate added insulation during reconstruction work rather than treating it as a surface treatment. Review planned solar arrays, HVAC replacements, service walkways, and access routes during the same assessment. The right repair preserves those options instead of leaving a short-lived patch under equipment that will complicate every future service visit.
Choose Repair or Replacement in Fort Worth and Nearby Cities
Repair localized damage when the surrounding membrane is serviceable, insulation tests dry, attachment remains sound, and the roof has useful life remaining. A failed curb or isolated puncture doesn't justify removing an otherwise functional roof. Conversely, repeated repairs across separate zones deserve an assembly-level assessment.
Choose reroofing or phased replacement when seams fail broadly, moisture affects substantial areas, attachment is unreliable, or the membrane can no longer accept durable repairs. Age informs that decision, but condition and repairability should control it.
Require a scope you can evaluate
Before signing, require a documented moisture assessment or justified core-cut program, a written scope identifying membrane chemistry and thickness, and applicable warranty documents. The proposal should explain removal limits, insulation replacement, flashing reconstruction, drainage corrections, and how concealed conditions will be authorized.
- For repairs, require mapped locations and a defined acceptance check.
- For replacement, require assembly and attachment specifications, not just a membrane brand.
- For occupied properties, establish access, protection, and operating-hour constraints.
Fort Worth leads this service area: Census Bureau estimates for July 1, 2024 place Fort Worth at 1,008,106 residents, Dallas at 1,326,087, and Arlington at 403,672. The Dallas–Fort Worth–Arlington metropolitan estimate was 8,344,032 that day, following an increase of 177,922 over the prior year.
The Texas Comptroller's Metroplex profile reports a broader 2020 regional population of 8,044,641, representing 27.6% of Texas, with the metropolitan statistical area accounting for 94.9% of that region. These are different geographic measures, but both describe a connected regional property market.
At Blue Lake Roofing & Remodeling, we provide commercial TPO, EPDM, and metal roofing work for commercial buildings, HOAs, and multifamily properties, including fast response for active leaks and maintenance. We schedule commercial work around operating hours and provide warranty documentation, inspection reports, and insurance-ready records.
For properties in Fort Worth, Dallas, Arlington, Mansfield, Burleson, Keller, Grapevine, Irving, Grand Prairie, North Richland Hills, Plano, Frisco, McKinney, and Denton, Blue Lake Roofing & Remodeling offers a free on-site roof inspection to assess the leak and determine whether repair or replacement fits the roof's condition. Visit Blue Lake Roofing & Remodeling to book before the next North Texas storm season, and have your leak photographs, roof records, and warranty information ready for the inspection.
